Wood bottle stoppers are a great way to keep your drinks fresh and stay hydrated. There are many different ways to go about producing them, with different wood types, shapes and sizes. In this article we’ll dive into the process of making wood bottle stoppers and offer up six tips to make that process easier!
What is a Wood bottle stopper?
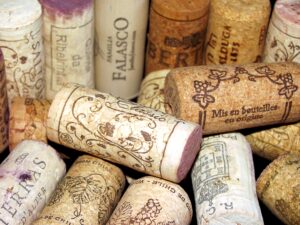
A wood bottle stopper is a small, cylindrical piece of wood that is inserted into the top of a wine bottle to seal it. The stopper is usually made of cork or another type of soft material, and has a small hole in the center that allows air to enter the bottle and prevents the wine from spilling out.
Wood bottle stoppers are an essential part of the wine-making process, and are used to seal the bottles before they are shipped or stored. They are also used to prevent oxygen from entering the wine and causing it to spoil.
There are several different types of wood bottle stoppers available on the market, and each type has its own unique benefits and drawbacks. Cork stoppers are the most popular type of stopper, as they provide a tight seal and are easy to insert and remove. However, cork stoppers can be expensive, and they may not always provide a perfect seal.
Plastic stoppers are another popular option, as they are less expensive than cork stoppers and also provide a good seal. However, plastic stoppers can be difficult to remove, and they may not always fit snugly in the neck of the bottle.
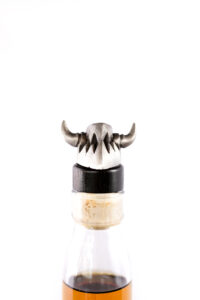
Metal stoppers are another option, but they are not as common as cork or plastic stoppers. Metal stoppers can provide a good seal, but they can be difficult to remove and may leave scratches on the inside of the bottle.
Where to Find Wood For A Wood bottle stopper
There are a few different places that you can find wood for your bottle stoppers. You can either use scraps from other woodworking projects, buy small pieces of wood from a hardware store, or cut your own pieces of wood from a larger piece of lumber.
If you are using scraps from other projects, make sure that the pieces are small enough to fit inside the neck of the bottle. You will also want to make sure that the pieces are sanded smooth and free of any splinters.
If you are buying small pieces of wood from a hardware store, look for pieces that are about 1/2 inch thick and 3-4 inches long. These pieces should be easy to cut into the desired shape and size for your bottle stopper.
If you are cutting your own pieces of wood, start with a larger piece of lumber and cut it into smaller strips that are about 1/2 inch thick and 3-4 inches long. Use a sharp knife or saw to make clean, straight cuts. Sand the edges of the strips smooth to avoid any splinters.
How to Cut The Wood for the Bottle Stopper
Cutting the wood for your bottle stopper is a critical first step in the production process. There are a few different ways that you can cut the wood, but we recommend using a saw.
If you’re using a saw, there are a few things to keep in mind. First, make sure that the blade is sharp. A dull blade will make it difficult to get clean cuts and can cause the wood to splinter. Second, take your time when cutting. rushing through this step will likely result in inaccurate cuts. Finally, be careful not to overcut – you want the cuts to be as close to the final dimensions as possible.
Once you’ve cut the wood to size, it’s time to move on to the next step in the process: shaping it into a stopper.
How to Drill The Holes in the Wood bottle stopper
To drill the holes in the stopper, first mark out where you want the holes to go using a pencil. Then, using a hand drill or a power drill, carefully drill through the wood at the marked points. If you’re using a hand drill, be careful not to apply too much pressure and to keep the drill steady. When you’ve finished drilling, smooth off any rough edges with sandpaper.
How to Assemble the Bottle Stopping Process
The first step is to make the wooden plug. You will need a drill bit that is slightly smaller than the outside diameter of your bottle’s neck, and a saw to cut the plug to length. Once you have your plug, use a small amount of wood glue to attach it to the top of your bottle.
Next, take your elastic cord and tie a knot in one end. Thread the other end through your stopper’s hole, and then pull it tight so that the knot rests against the top of the plug. Trim any excess cord, and then add a dab of glue to secure it in place.
Finally, insert your bottle stopper into the neck of your bottle. If it’s a tight fit, you may need to tap it gently with a mallet or hammer. Once it’s in place, you’re ready to start enjoying your wine!
Conclusion
We hope that these tips have made the wood bottle stopper production process a little easier for you. If you need help finding the right supplies or equipment, check out our selection of wood bottle stoppers and find everything you need to get started. Do you have any tips of your own? Share them with us in the comments below!