If you’re a fan of woodworking and enjoy a good bottle of wine, then you might want to try your hand at making your own DIY Wood Bottle Stoppers. These stoppers are not only functional, but they also make a unique and personalized addition to any home bar or kitchen. With a bit of patience and the right tools and materials, crafting your own wood bottle stoppers can be a fun and rewarding project. In this post, we’ll share some tips and tricks for creating your own DIY Wood Bottle Stoppers that will impress your friends and family. From choosing the right wood to finishing the final product, we’ve got you covered. So let’s get started!
Choosing the right wood to DIY Wood Bottle Stoppers
When it comes to choosing the right type of wood for your DIY Wood Bottle Stoppers, there are a few important factors to consider:
Durability: The wood you choose should be strong and durable enough to withstand regular use as a bottle stopper. Some of the best options for bottle stoppers include hardwoods such as oak, maple, walnut, and cherry.
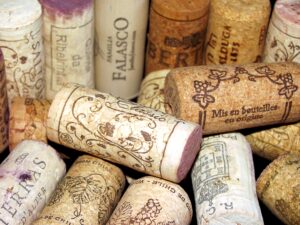
Grain patterns: The grain pattern of the wood can have a significant impact on the overall look of your bottle stoppers. Some types of wood, such as curly maple or birdseye maple, have distinctive and eye-catching grain patterns that can add a unique touch to your project.
Texture: The texture of the wood is another important consideration. Some woods have a smooth, uniform texture, while others have a more rustic or knotty appearance. Consider the style and aesthetic you are going for when selecting your wood.
Availability: Finally, consider the availability and cost of the wood. Some types of wood may be more difficult to find or more expensive than others, so be sure to do your research and choose a wood that is within your budget and readily available in your area.
In general, it’s a good idea to choose a high-quality hardwood that has a tight and even grain pattern, as this will give you the best results when turning the wood on your lathe. Additionally, if you’re new to woodworking, it may be helpful to choose a wood that is easy to work with and forgiving of mistakes, such as cherry or maple. With a little bit of research and consideration, you’re sure to find the perfect wood for your DIY Wood Bottle Stoppers.
Preparing the wood to DIY Wood Bottle Stoppers
Before you can begin turning your wood into a bottle stopper, you will need to prepare it by cutting it into the right size and shape. Here’s a step-by-step guide on how to do this:
Choose your wood: Start by selecting a piece of hardwood that is suitable for turning. Cut the wood into a rough square or rectangular shape that is slightly larger than your desired final dimensions.
Mount the wood on the lathe: Use your chuck to secure the wood onto the lathe. Make sure that it is centered and balanced before tightening the chuck fully.
Rough shaping: Use a roughing gouge to begin shaping the wood. Start with the highest speed setting on your lathe and use the gouge to remove the corners of the wood and create a cylinder shape. Continue shaping the wood until you have a basic cylinder shape that is slightly larger than your desired final dimensions.
Mark your dimensions: Use a caliper or ruler to mark the length and diameter of your desired final bottle stopper dimensions. Be sure to leave a small amount of extra wood on the end of the cylinder, as this will be used to shape the top of the bottle stopper.
Fine shaping: Use a skew chisel or other cutting tools to shape the wood to your marked dimensions. Take your time and make sure that you are cutting smoothly and evenly. Check your progress frequently with your caliper or ruler.
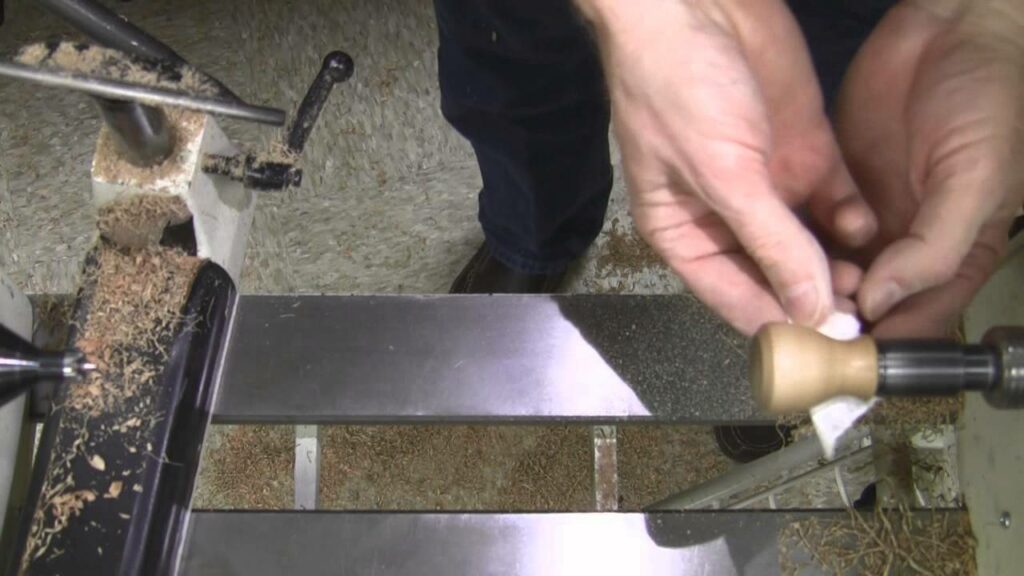
Sanding: Use sandpaper of varying grits to sand the wood to a smooth finish. Start with a low grit sandpaper and work your way up to a higher grit. Be sure to sand the entire surface of the wood, including the top of the stopper.
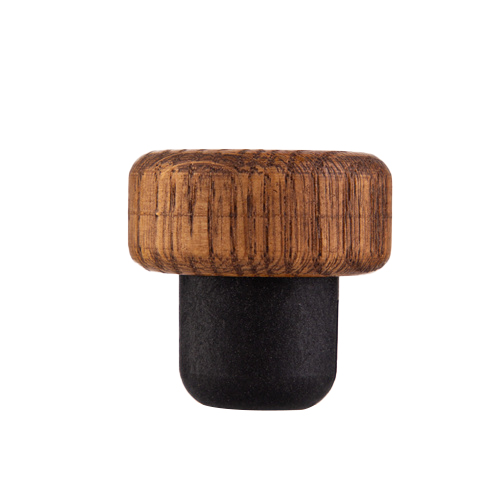
Final touches: Use a parting tool or other cutting tools to create the groove or threads that will secure the stopper in the bottle. Finally, apply a finishing oil or wax to the wood to protect and enhance its natural beauty.
By following these steps, you can prepare your wood for turning and create a beautiful and functional bottle stopper. Be sure to take your time and use caution when working with your lathe and cutting tools, and always wear appropriate safety gear to protect yourself from flying debris.
Turning the stopper to DIY Wood Bottle Stoppers
Turning wood on a lathe is a skill that can take time to master, but with patience and practice, anyone can create beautiful and functional pieces. If you’re looking to turn a stopper for a bottle or container, here are some instructions to help you get started:
- Choose your wood: Select a dense hardwood that will hold up well and provide an attractive finish. Some popular choices for stoppers include cherry, maple, and walnut.
- Mount your wood: Secure the wood onto the lathe using a chuck or faceplate. Make sure the wood is centered and balanced before turning on the lathe.
- Rough shaping: Using a roughing gouge, start to shape the wood into a cylinder. Work from one end of the wood to the other, taking care to maintain an even diameter.
- Create the tenon: Once you have the cylinder shaped, create a tenon on one end of the wood. This will be the part that fits into the container opening. Use a parting tool to create a shoulder for the tenon to stop against.
- Shape the stopper: Using a spindle gouge, begin to shape the stopper to your desired design. Be careful not to remove too much material too quickly, as this can cause the wood to crack or break.
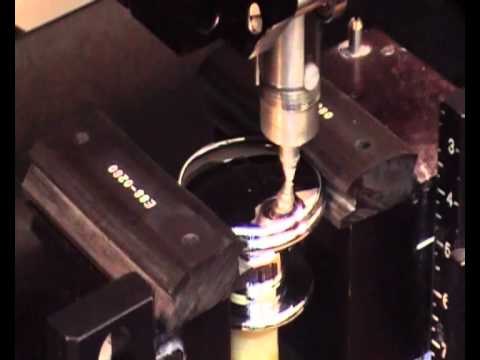
- Create the threads: Once the shape of the stopper is complete, create the threads that will allow it to screw into the container opening. Use a threading tool to create a spiral groove on the tenon.
- Test the fit: Make sure the threads fit snugly into the container opening. You may need to adjust the threads slightly to get a secure fit.
- Finish the stopper: Sand the stopper to a smooth finish, and apply a finish of your choice, such as wax or oil.
With these steps, you can create a functional and beautiful stopper for your container. Remember to take your time and work carefully, as turning on a lathe can be dangerous if not done properly.
Sanding and finishing to DIY Wood Bottle Stoppers

Once you have turned the stopper to your desired shape and created the necessary grooves and threads for a secure fit, the next step is to sand the stopper to a smooth finish. Here are some steps to follow for sanding:
Start with coarse sandpaper: Begin sanding with a coarse grit sandpaper, such as 80 or 100 grit. Use a sanding pad or your fingers to apply even pressure as you sand the entire surface of the stopper. This will remove any rough spots or tool marks.
Progress to finer grits: Gradually work your way up to finer grit sandpaper, such as 150, 220, and 320 grit. Sand each grit until you have removed all scratches and achieved a smooth surface. Be sure to sand with the grain of the wood.
Remove dust: Use a soft cloth or compressed air to remove any dust or debris from the surface of the stopper.
Apply a finish: Once the stopper is sanded to a smooth finish, you can apply a finish to protect the wood and bring out its natural beauty. There are several options for finishes, including oils and varnishes. Here are a few recommendations:
Danish oil: This oil is a popular choice for woodworking projects, as it penetrates deep into the wood and brings out its natural beauty. It also provides a durable finish that will protect the wood from moisture and scratches.
Tung oil: Tung oil is another penetrating oil that provides a durable finish. It is easy to apply and will bring out the natural beauty of the wood.
Polyurethane varnish: If you are looking for a more durable finish, polyurethane varnish is a good choice. It provides a hard, protective coating that will resist scratches and moisture.
When applying a finish, be sure to follow the manufacturer’s instructions and apply in a well-ventilated area. Apply multiple coats if necessary, sanding lightly between coats to achieve a smooth surface. With these steps, you can create a beautiful and functional stopper that will last for years to come.
In conclusion, creating your own wood bottle stoppers can be a fun and rewarding DIY project. With some basic woodworking skills and a lathe, you can turn a beautiful and functional stopper that will add a touch of handmade elegance to your kitchen or bar. By following the steps outlined in this article, you can create a stopper that fits securely in your container and is finished to your desired level of smoothness and shine. With the right tools, materials, and techniques, you can turn a simple piece of wood into a work of art that will bring joy and practicality to your everyday life.